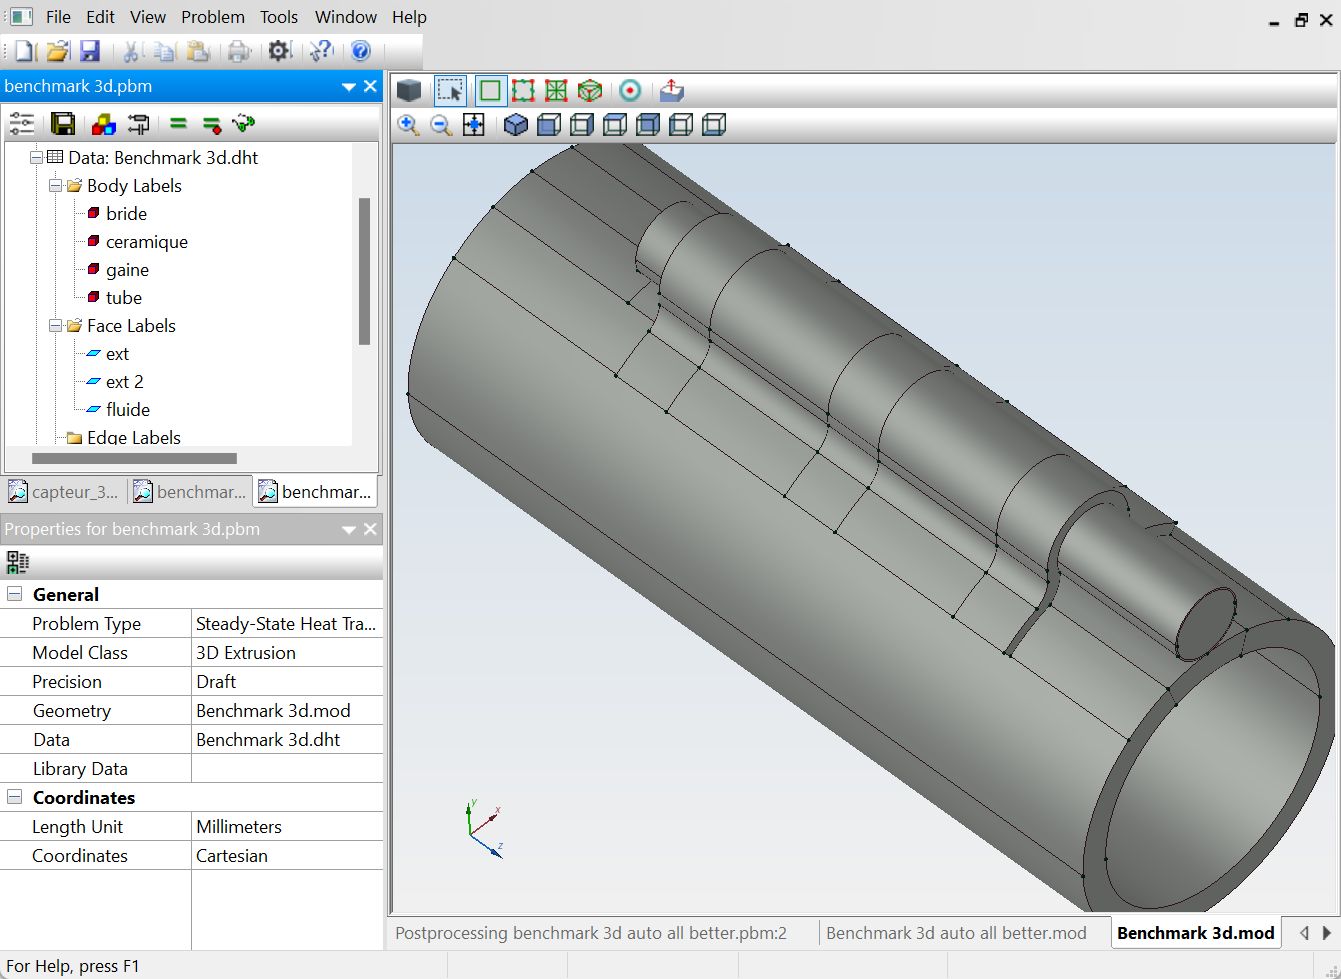
3D obtained by extrusion
Extrusion
is a very simple construction process requiring no tools outside of
QuickField™
. The concept is explained in the
Concept
paragraph. The
3D pre-processor
is used as in 2D designs, the only difference is to use a "z" dimension when changing region.
The example below is the geometry of a temperature sensor brought back to the same plane :

After some very simple modifications, the "z" dimension for each material, we obtain this :
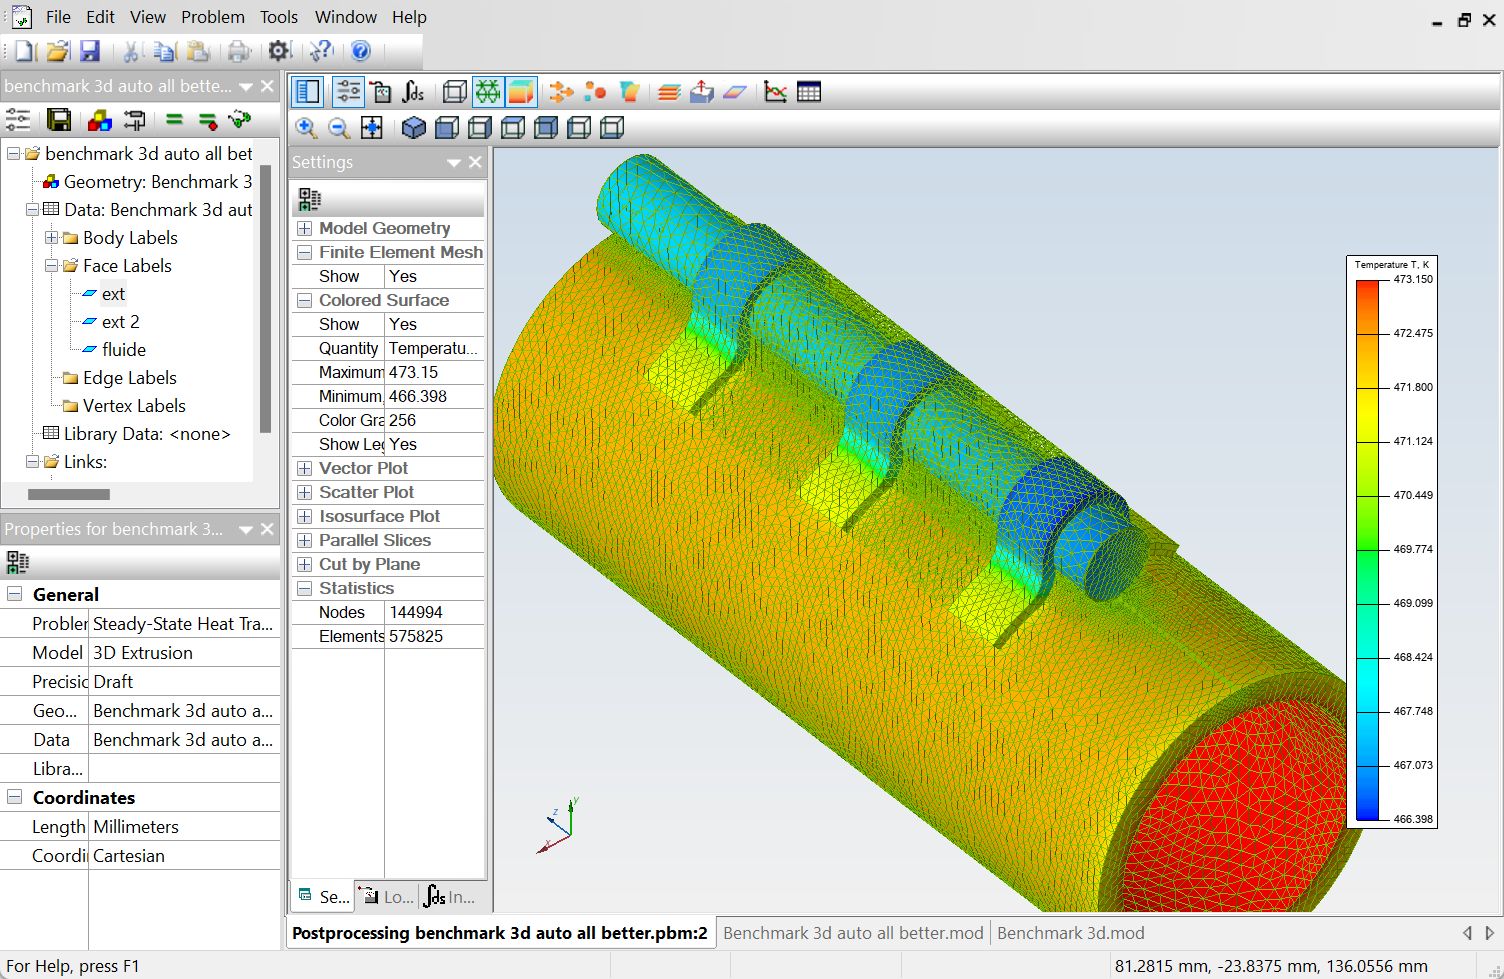
The post-processor allows you to visualize the results in different ways. A color representation being the most natural and the quickest to estimate the characteristics of a design :